Get API Key
To begin using Hovi APIs, you must authenticate your requests with an API key. Every user is automatically provided with an API key upon account creation. This pre-generated key can be used immediately to authenticate your API requests. However, you can manually generate additional keys if you need a separate key for different use cases.
Follow the steps below to get your API key in Hovi Studio.
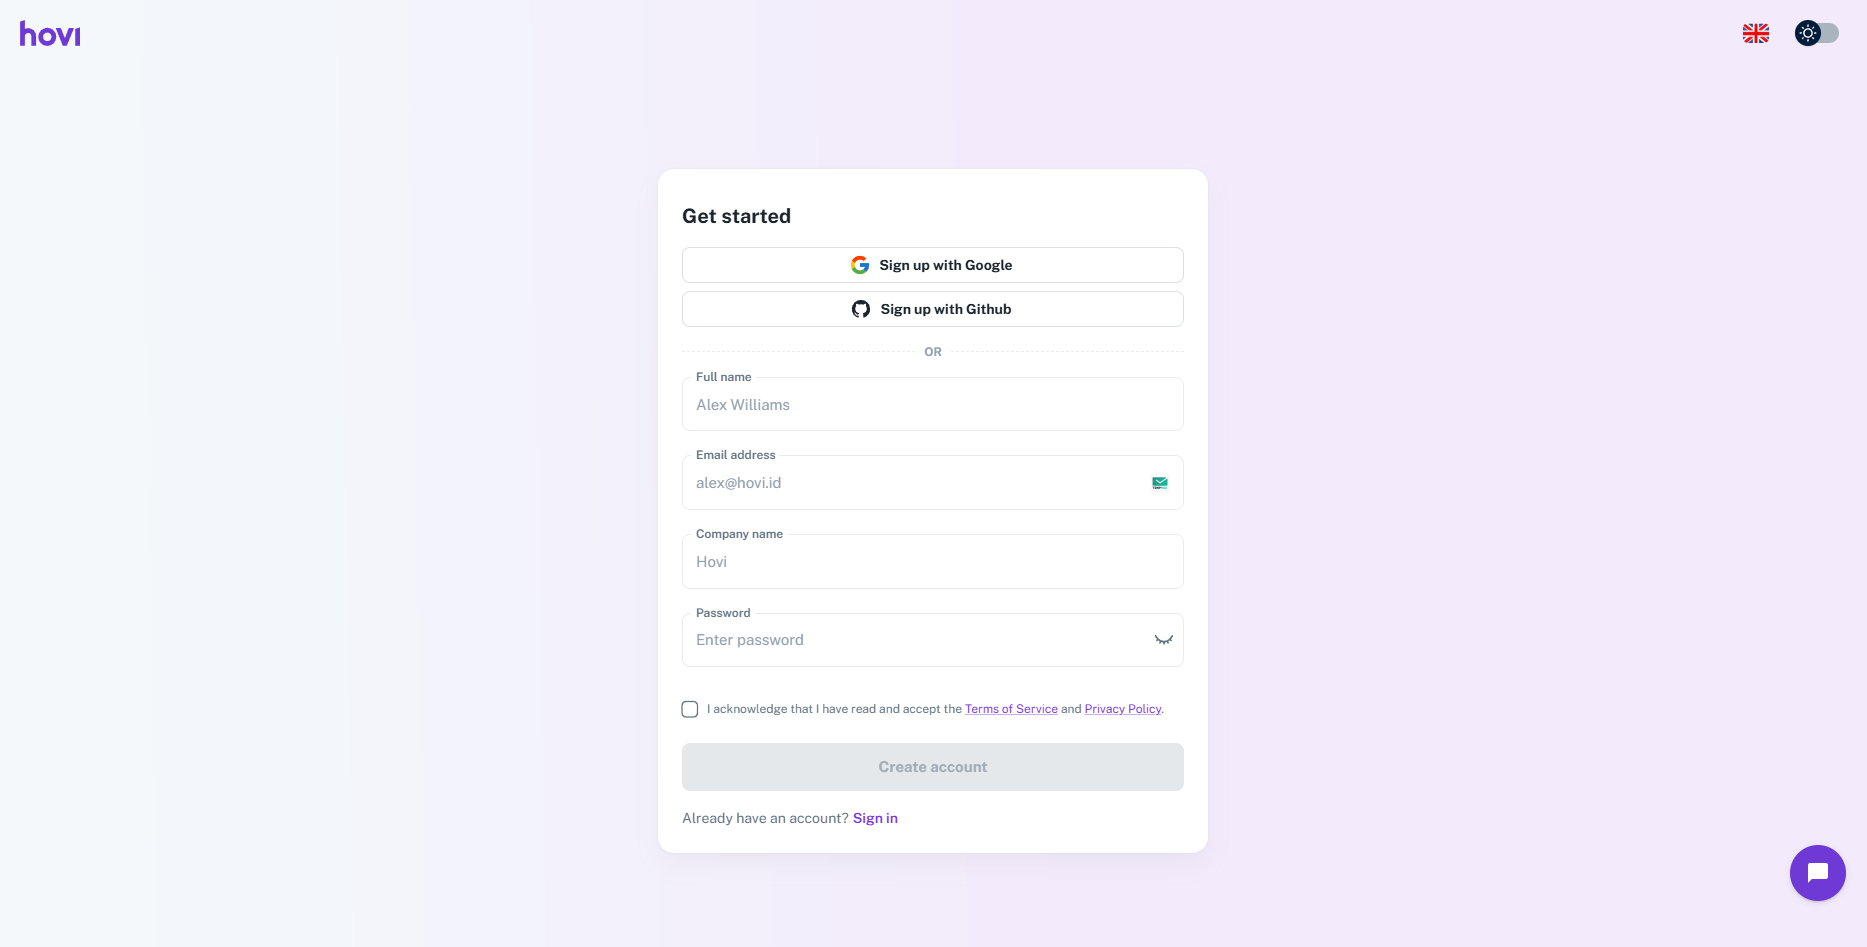
Step 1: Register for a Hovi Studio Account
If you haven’t already, register for a Hovi Studio account:
-
Visit Hovi Studio. Click "Get started" to access the sign-up page, or navigate directly to the sign-up page.
-
Complete the registration form by providing the required information and click "Create Account".
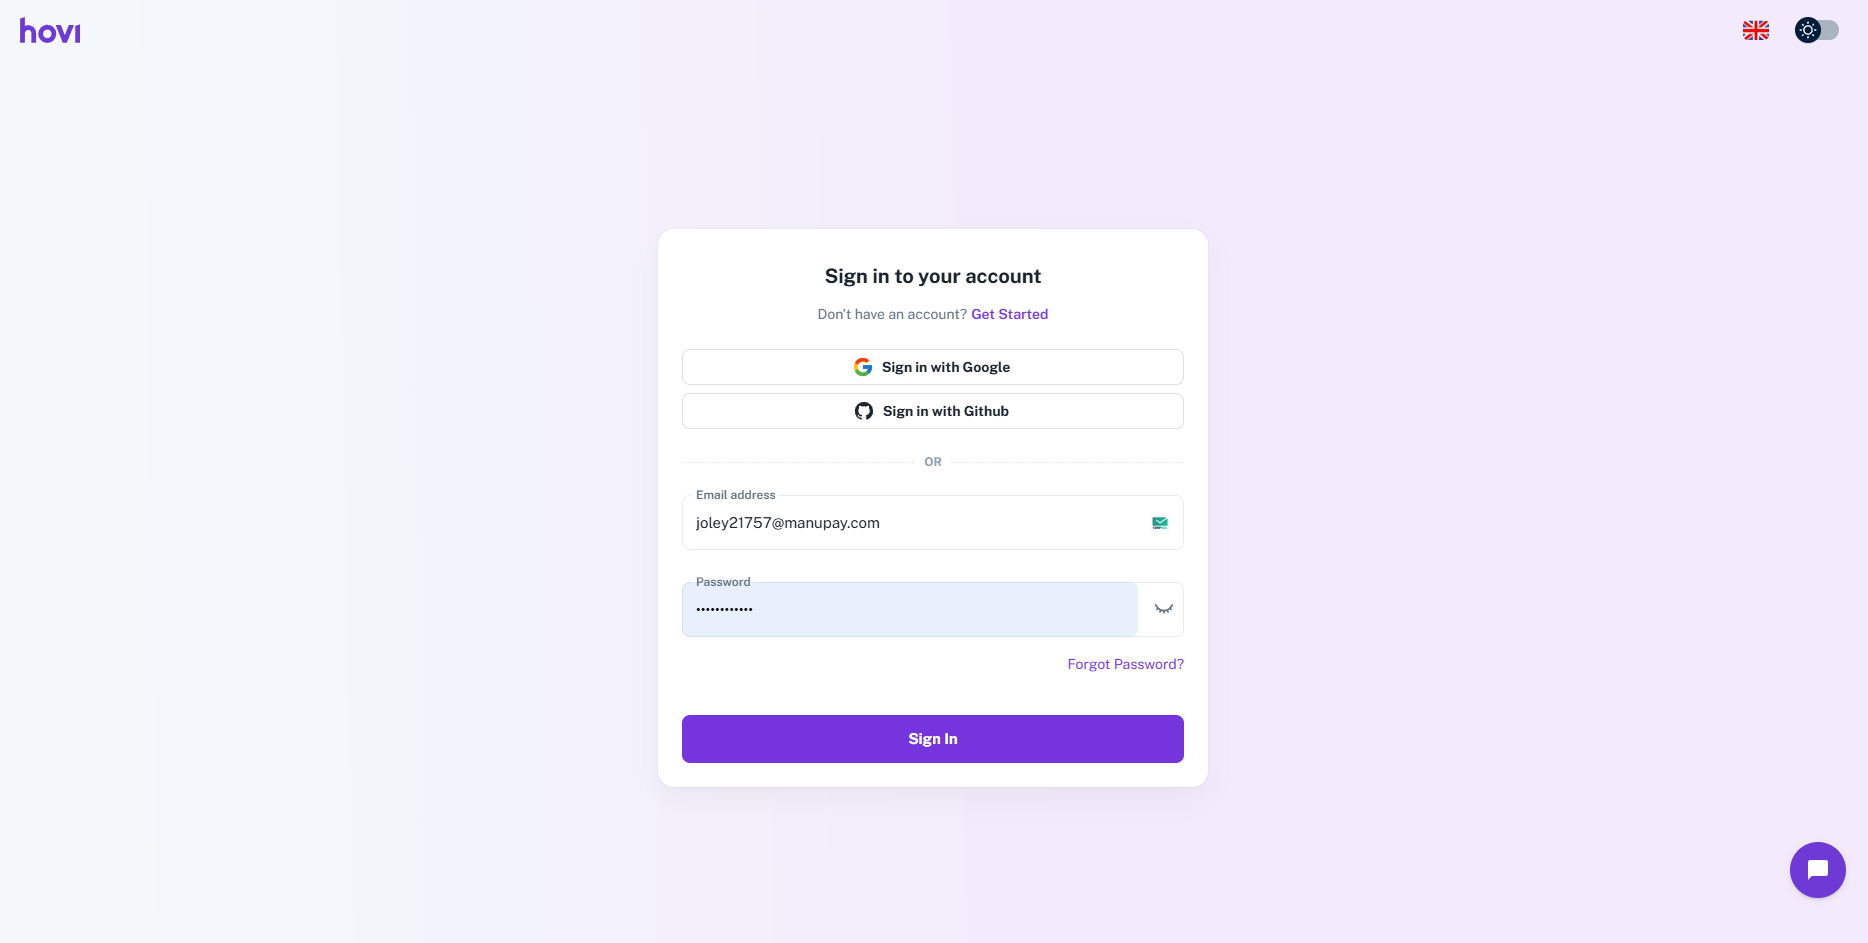
Step 2: Complete the Onboarding Process
-
Sign in using your registered credentials.
-
Create your first ecosystem by providing a "Name" and Select a network for your ecosystem from the available options.
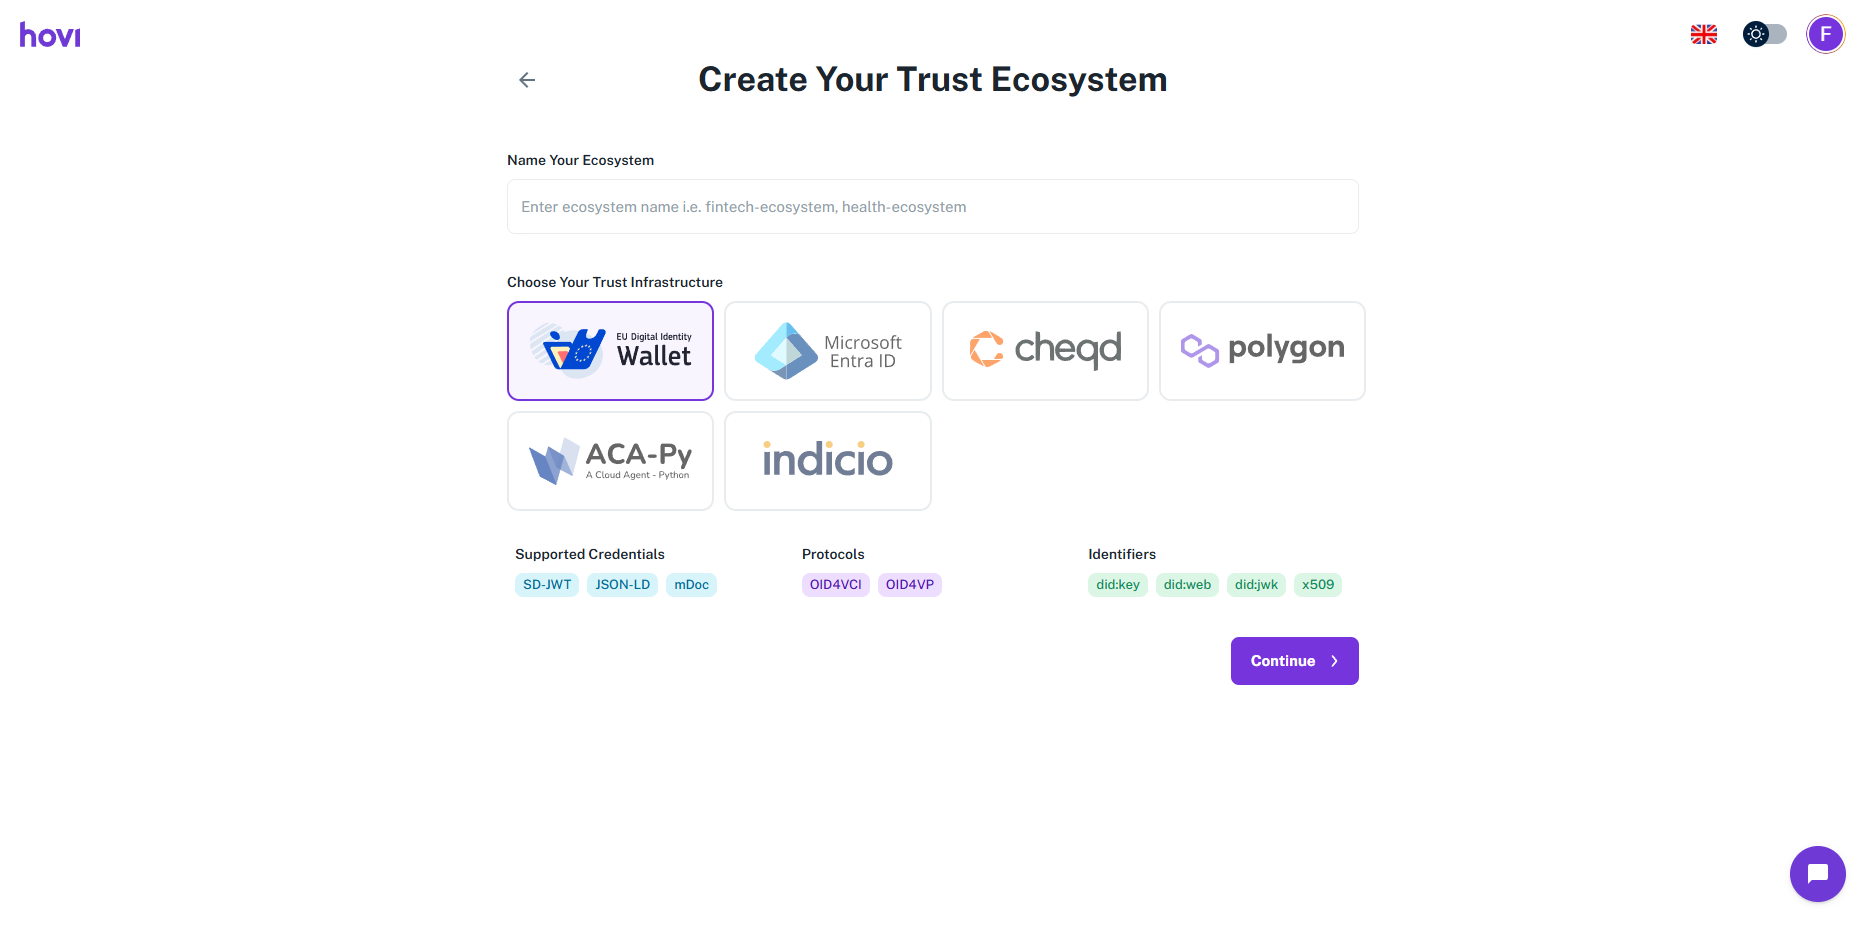
Once the onboarding is complete, you’ll be directed to the Hovi Studio dashboard.
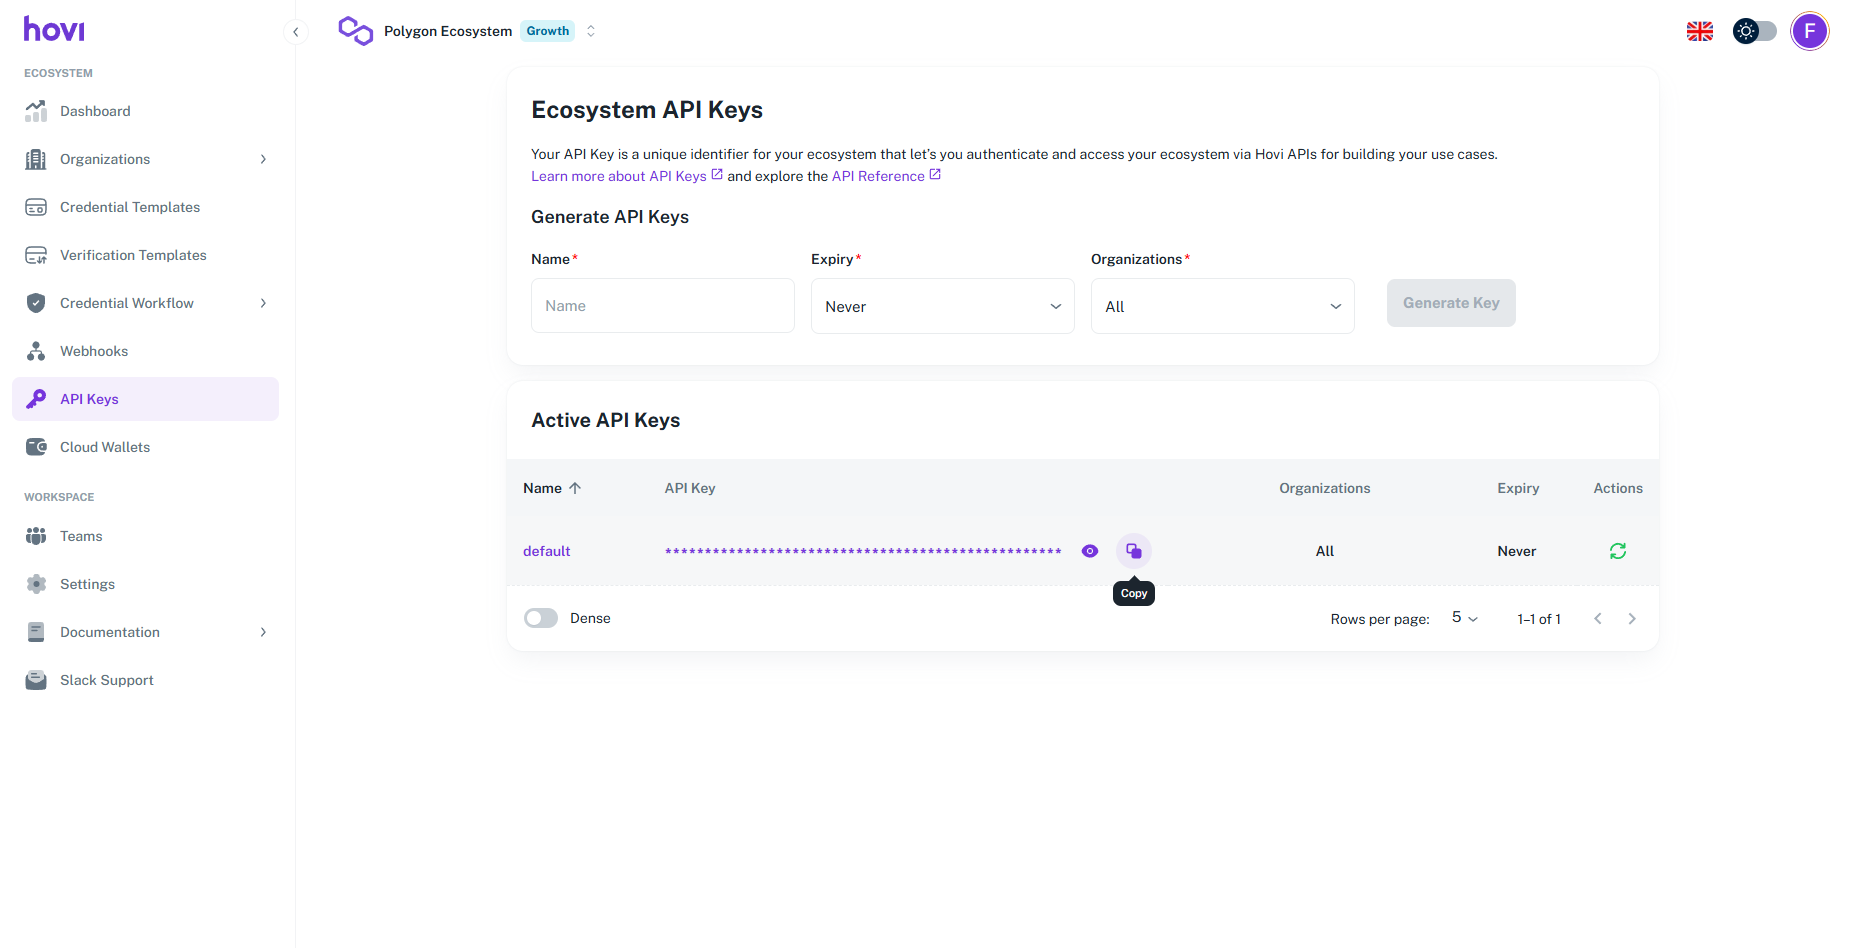
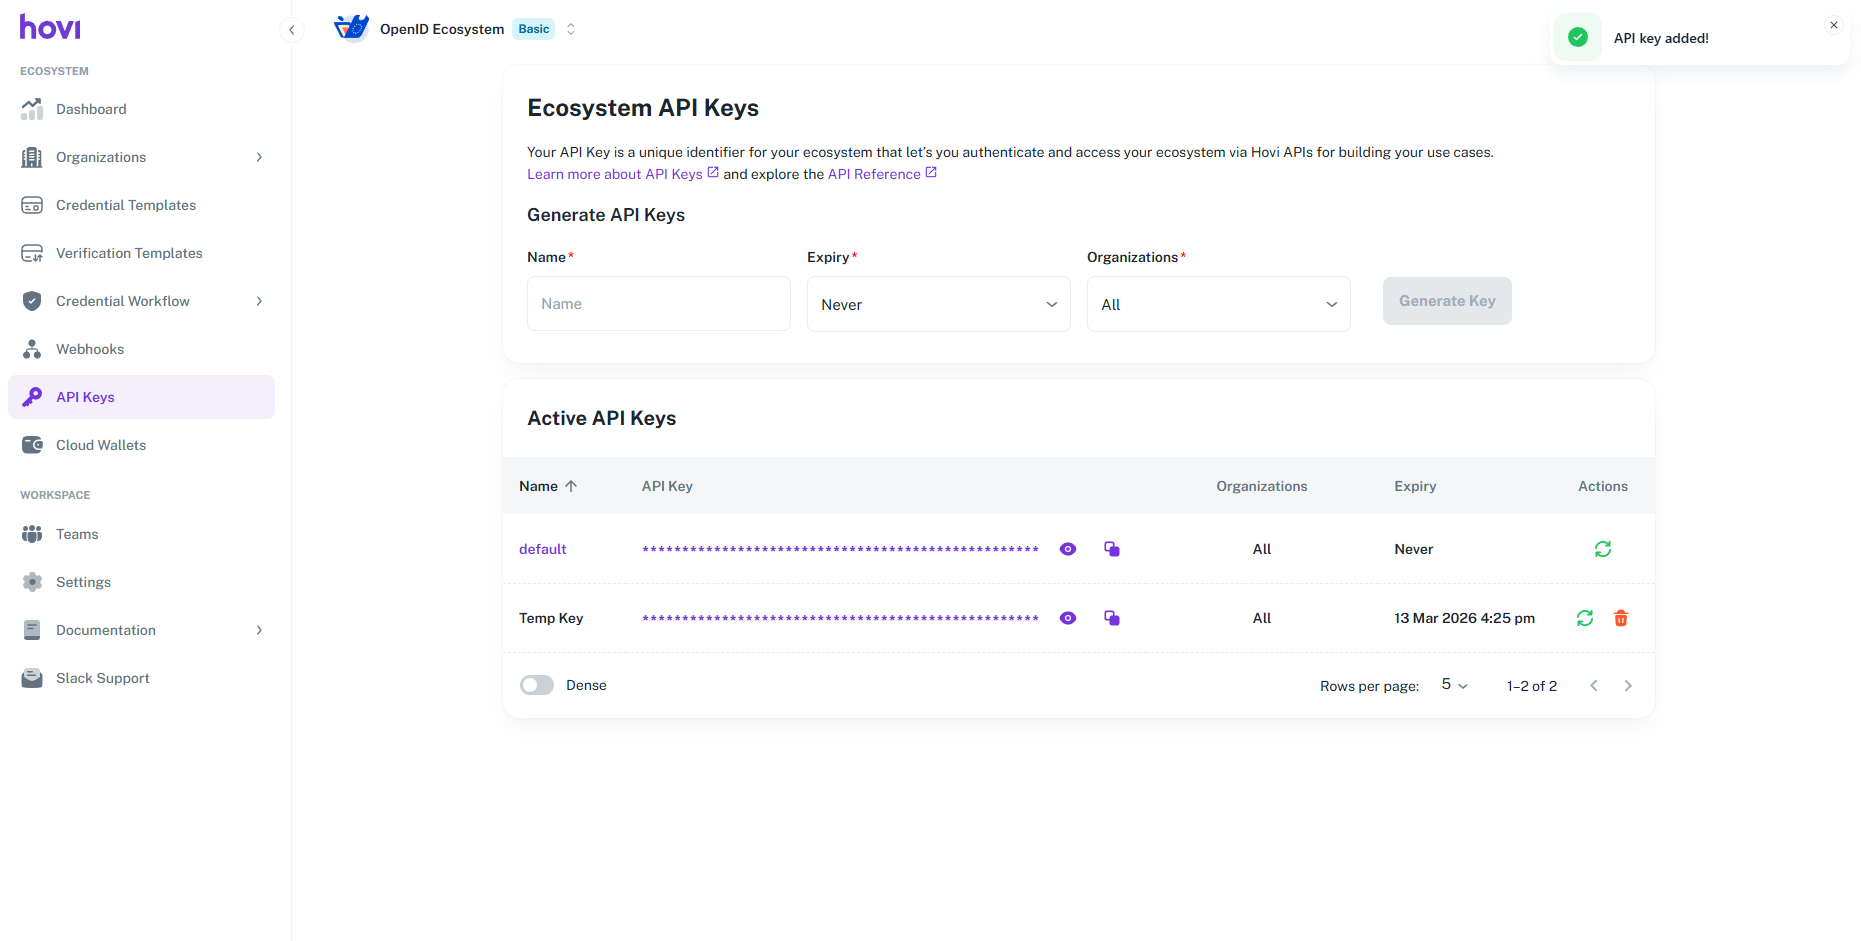
Step 3: Retrieve Your Pre-generated API Key
After onboarding, follow these steps to retrieve your API key:
-
Click on the "API Keys" tab from the left-hand navigation menu.
-
Your pre-generated API key will be available under the "Active API Keys" section.
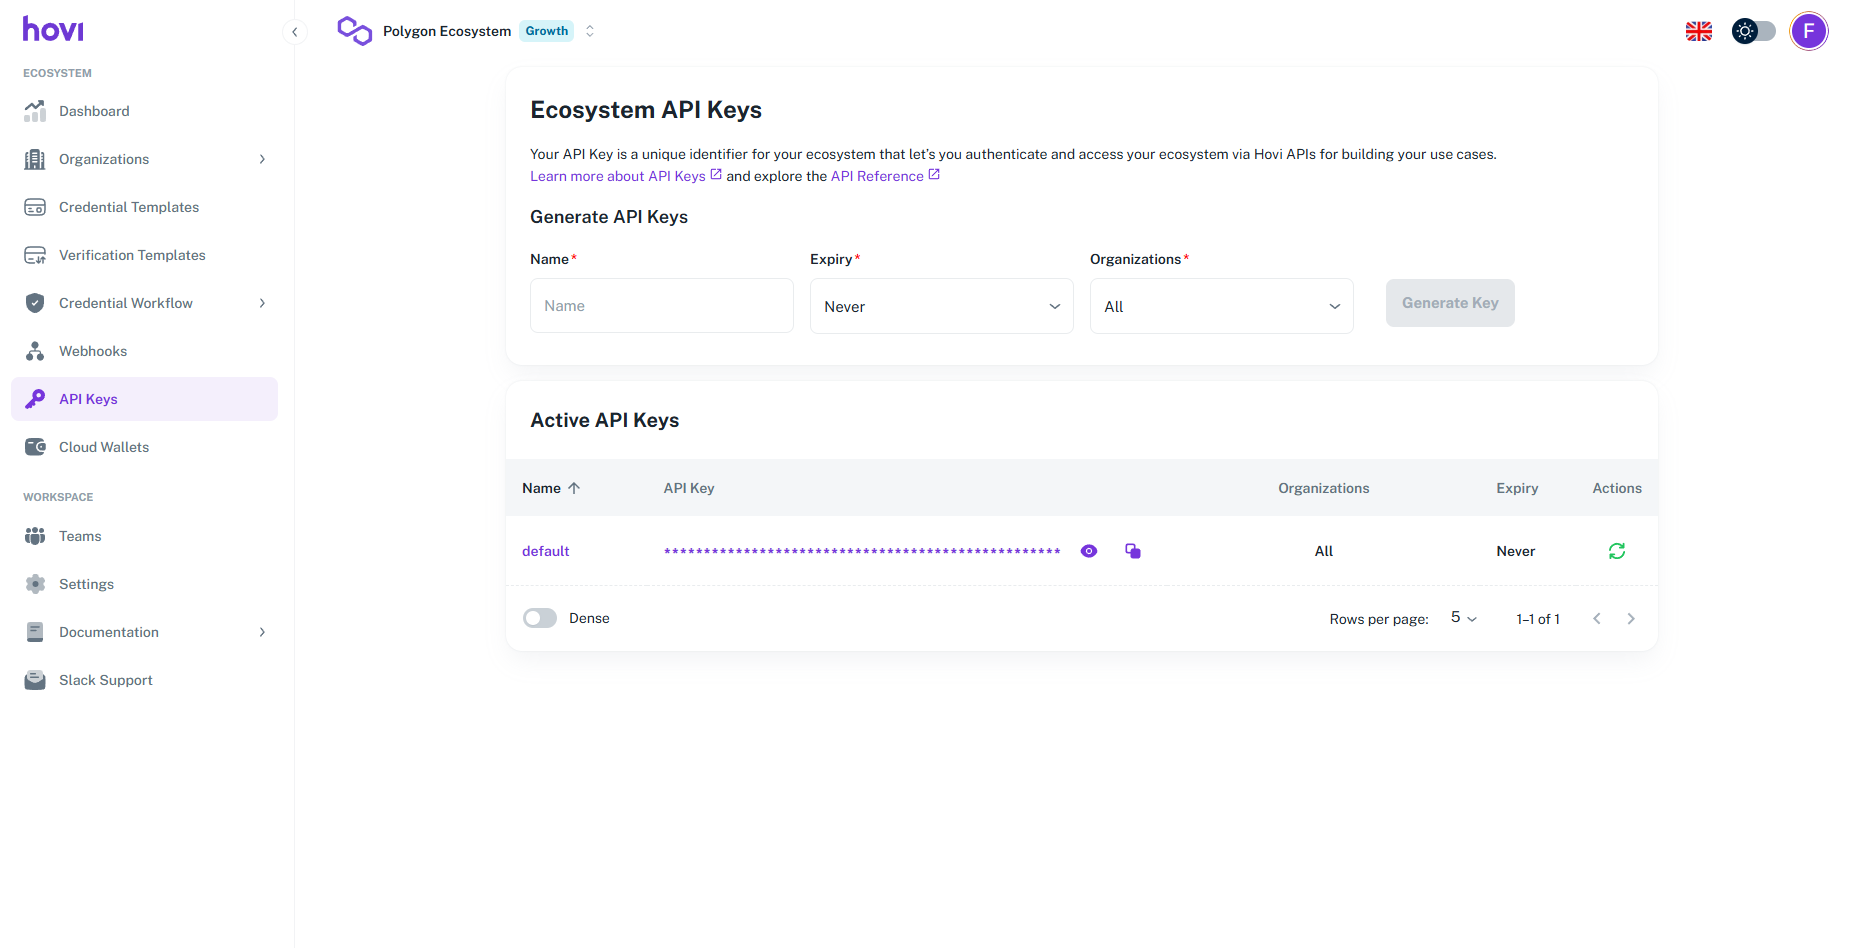
You can now use this key to authenticate your API requests.
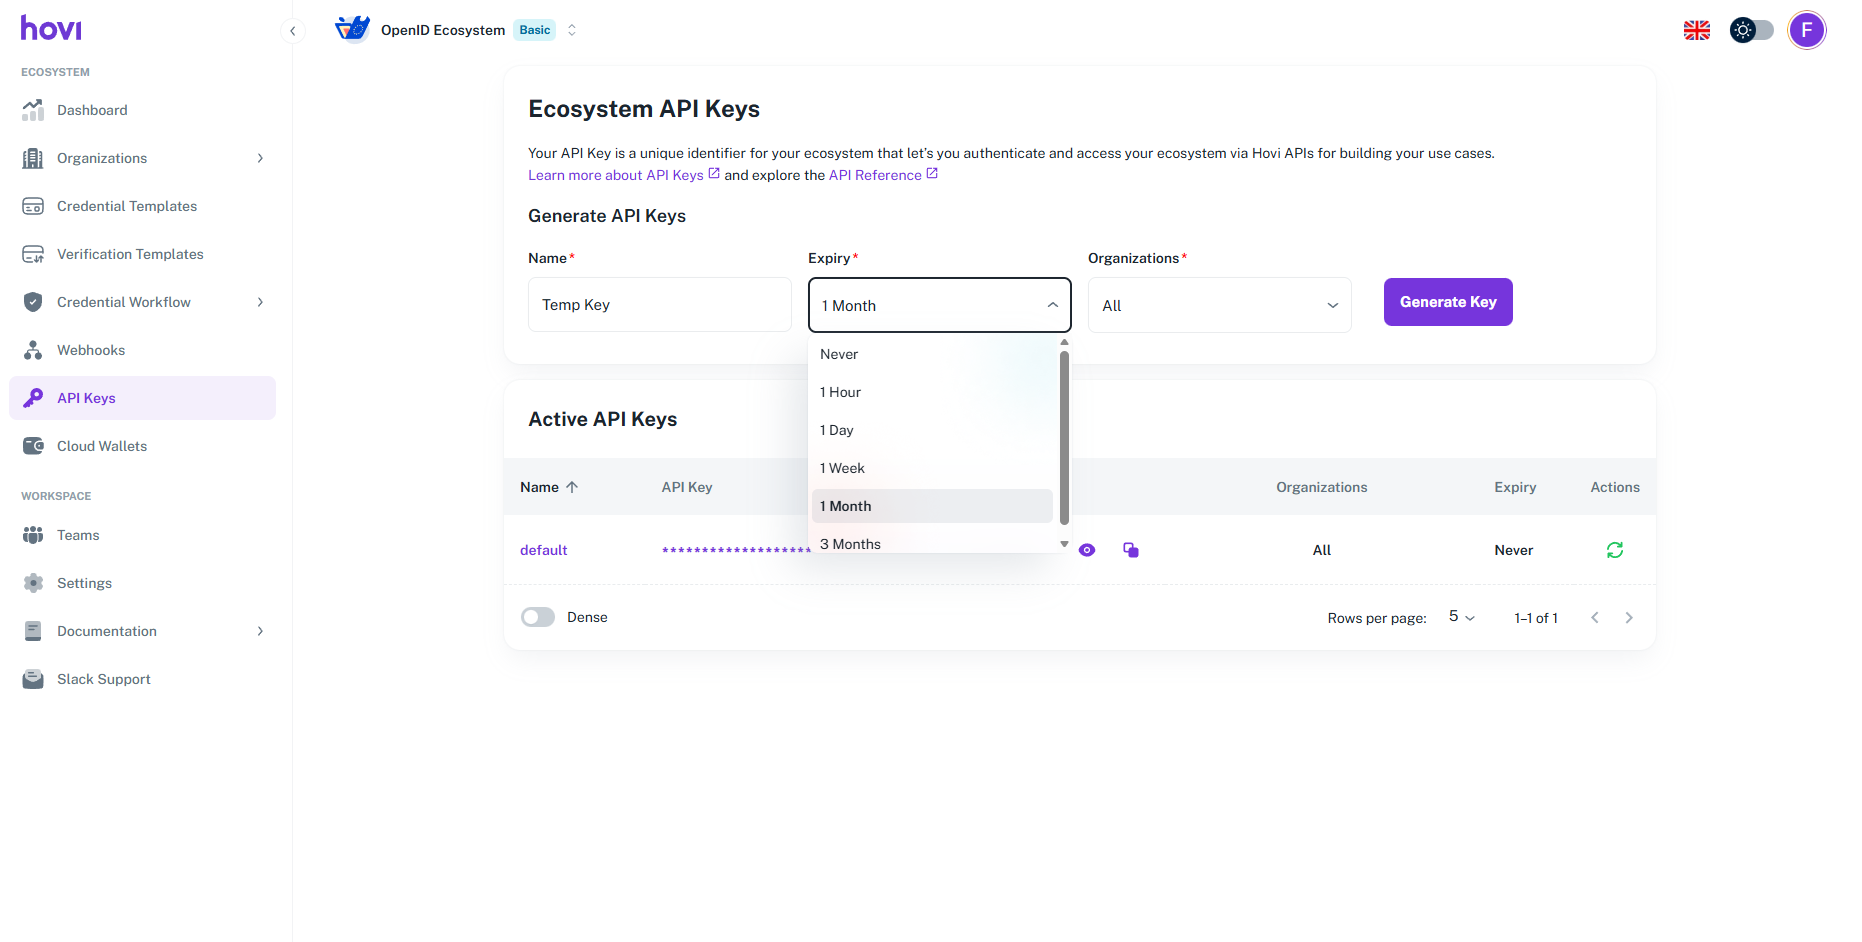
Step 4: Generate a New API Key (Optional)
If you need an additional API key for a different use case, you can generate one by following these steps:
-
Enter a "Name" for your new API key in the API Keys tab.

-
Set an "Expiry" date to create a temporary key.
-
Click "Generate Key" to create the new API key.
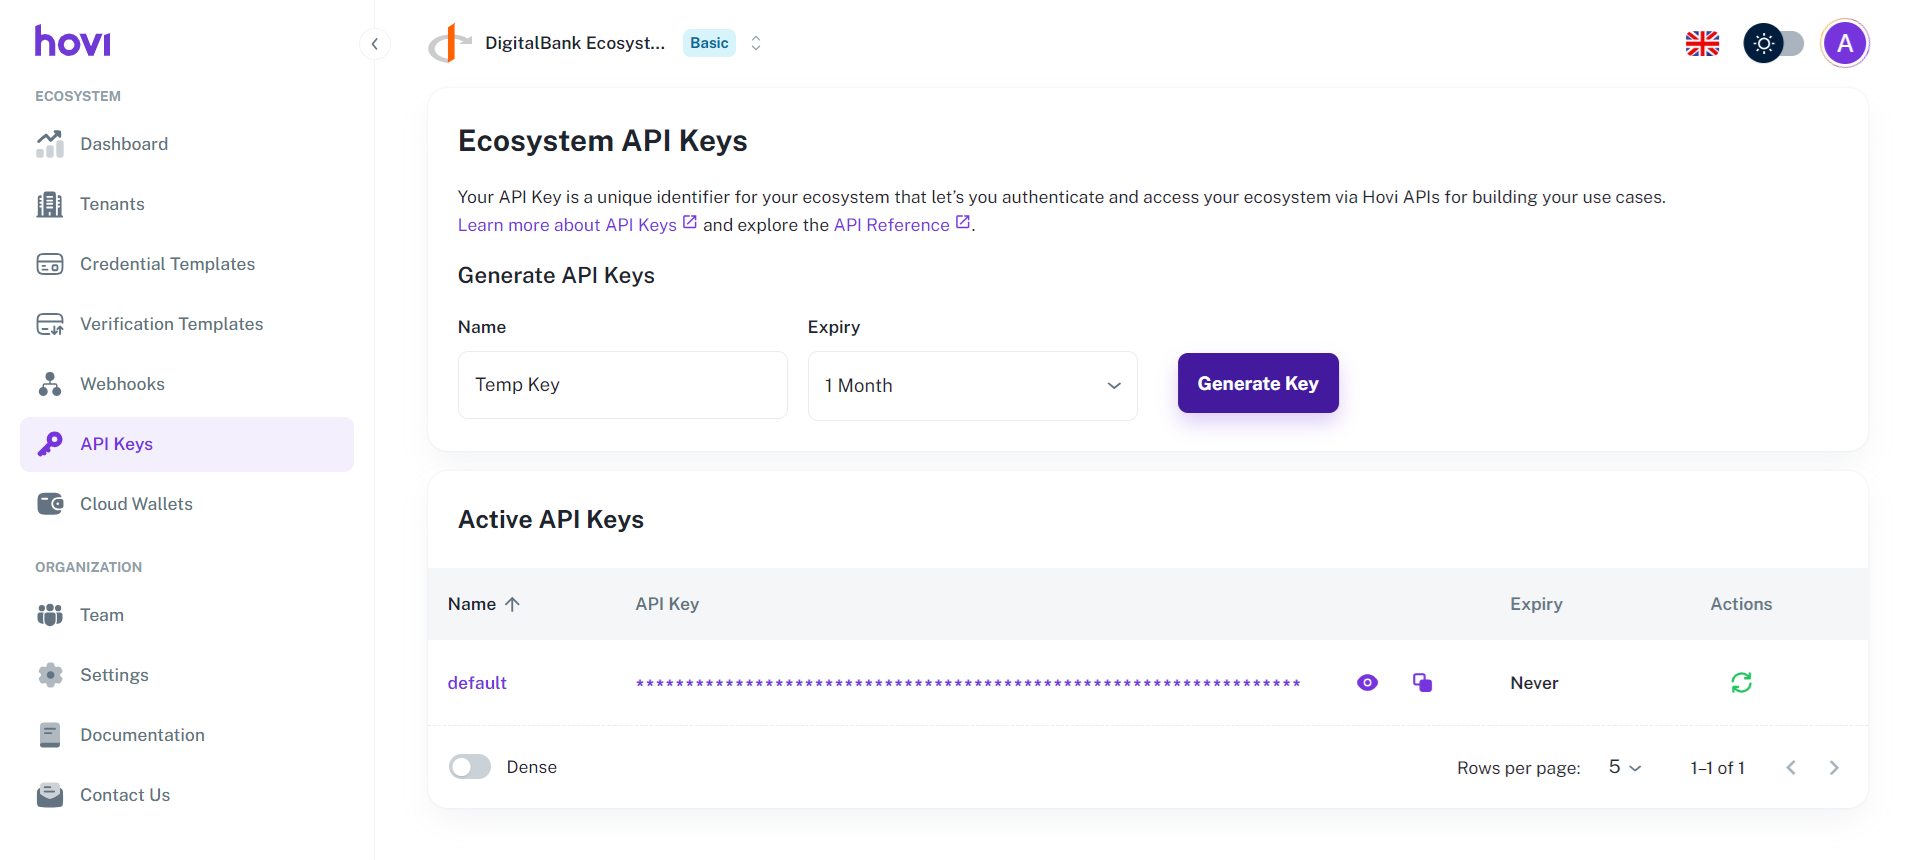
Your new API key will now be listed in the Active API Keys section.
Step 5: Use the API Key
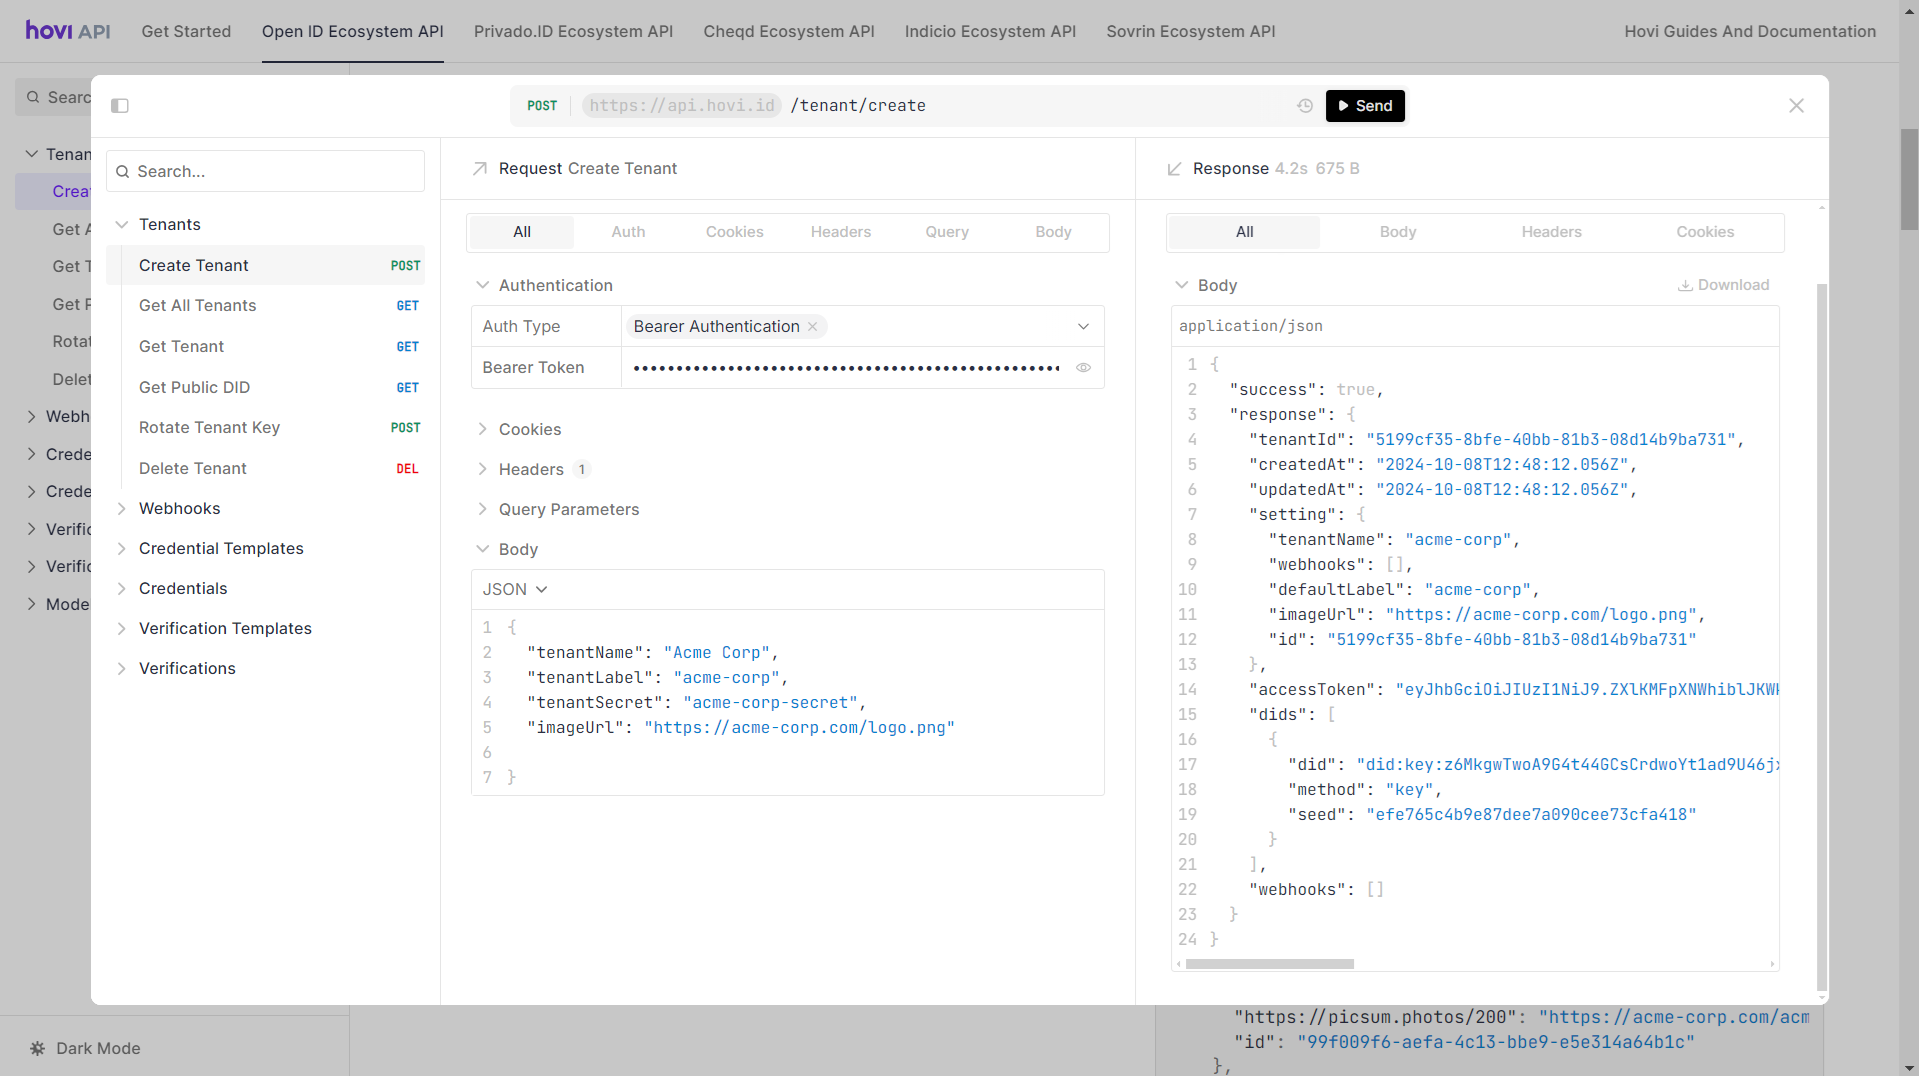
When making API requests, include the API key in the request header as a Bearer Token. Visit Hovi API Reference to explore and try out our endpoints.
Request Example
Here’s a request example depicting how to use an API key as a Bearer token to create a tenant:
Try it yourself here: Create a Organization.